

Installing PD-Tyre: sensors, connections and app setup
Fit the four internal TPMS sensors, record each wheel serial number, connect the hardware and set up PD-Tyre in the app with a diagram and screenshots.
Thank you for choosing PD-Tyre. Setup has two parts: physical installation, followed by software setup. Keep the supplied A4 sheet as your sensor serial-number record.
Before you start
- Four internal PD-Tyre TPMS sensors and the PD-Tyre receiver.
- PD-1 diagnostic dongle, PD-Display and the supplied Type-C splitter.
- USB-C to USB-C cables: two 0.5 m cables and one 2 m or 3 m display cable.
- The PD-1 mobile app on your phone, with Bluetooth enabled.
Part 1: Physical installation
PD-Tyre uses internal TPMS sensors fitted inside the wheels. Have a qualified tyre workshop carry out the fitting.
Record the serial numbers BEFORE fitting
Attach each sensor serial-number sticker to the matching position on your printed installation sheet before the workshop fits the sensors. The label spaces are 30 x 15 mm. Once the tyres are fitted, the serial numbers are hidden inside the wheels.
- FL: Front Left
- FR: Front Right
- RL: Rear Left
- RR: Rear Right
Left and right are from the driver's position, facing forward. Ask the fitter to install each sensor at its recorded wheel position. Keep this record for software setup and future servicing.
Have the workshop fit the four sensors
The workshop must fit the sensors inside the wheels at the recorded positions. Before leaving, confirm the wheel positions, the vehicle-recommended cold tyre pressures and a leak check.
Connect PD-1, the splitter, receiver and PD-Display
Use the system connection diagram below. All connections shown use USB-C to USB-C cables.
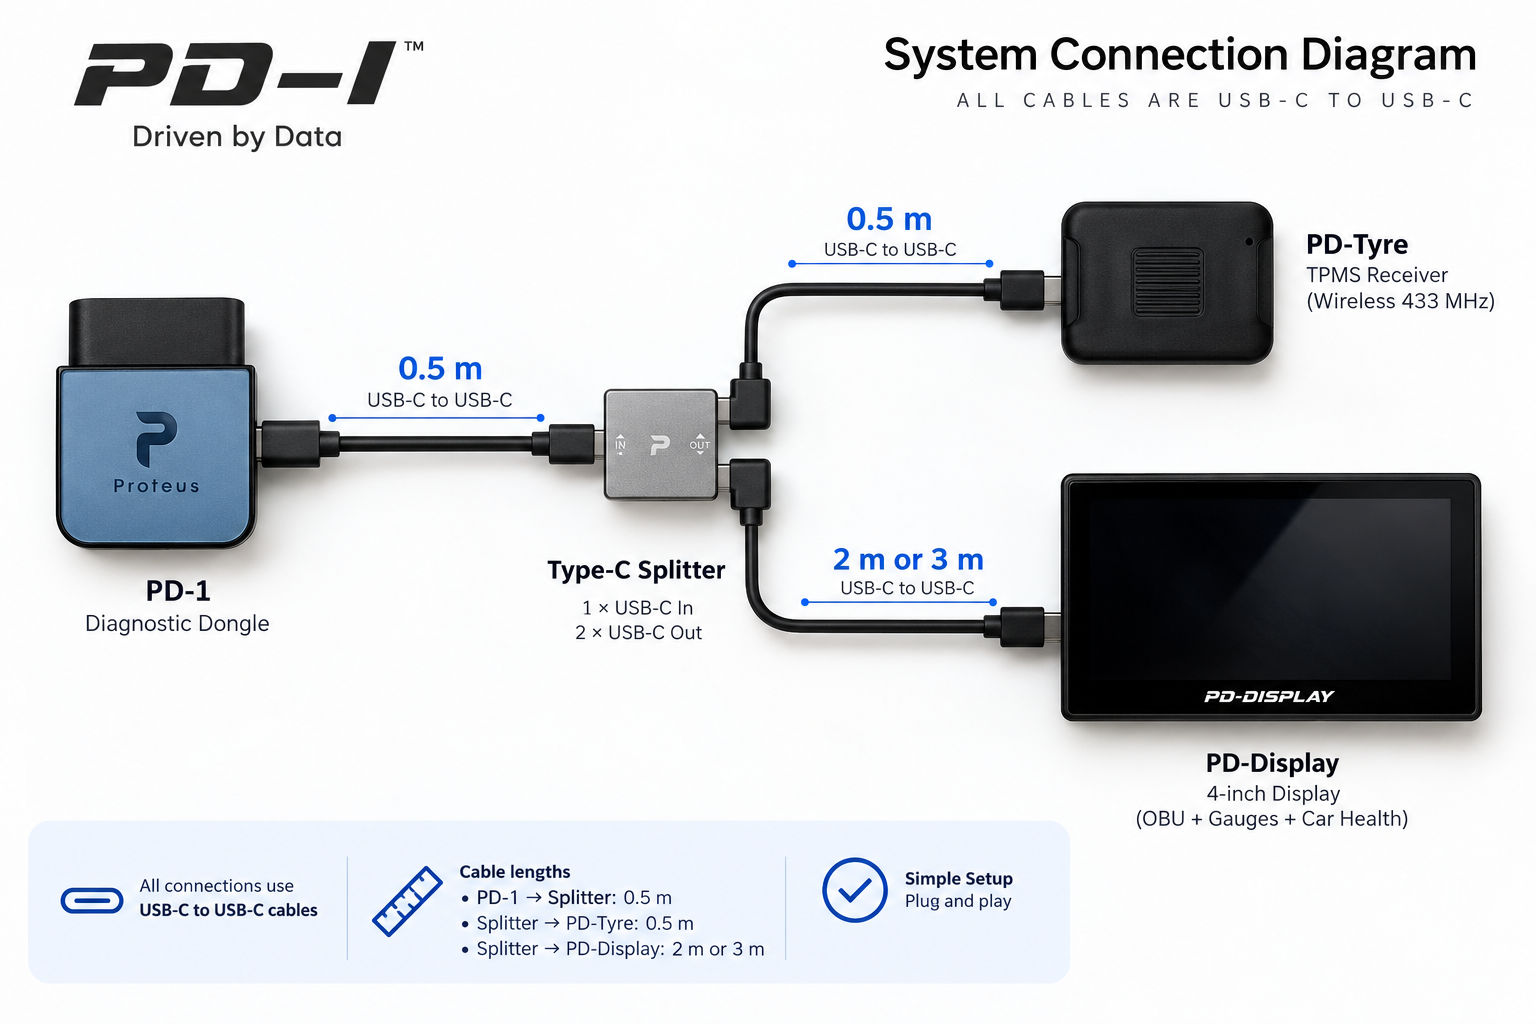
- Connect PD-1 to the splitter IN port with the 0.5 m cable.
- Connect one splitter OUT port to the PD-Tyre receiver with the 0.5 m cable.
- Connect the other splitter OUT port to PD-Display with the 2 m or 3 m cable.
Part 2: Software setup
Keep the receiver powered on and your phone nearby. Enable Bluetooth. The screenshots show example devices, vehicles and sensor IDs; use your own receiver and the serial-number labels recorded on your installation sheet.
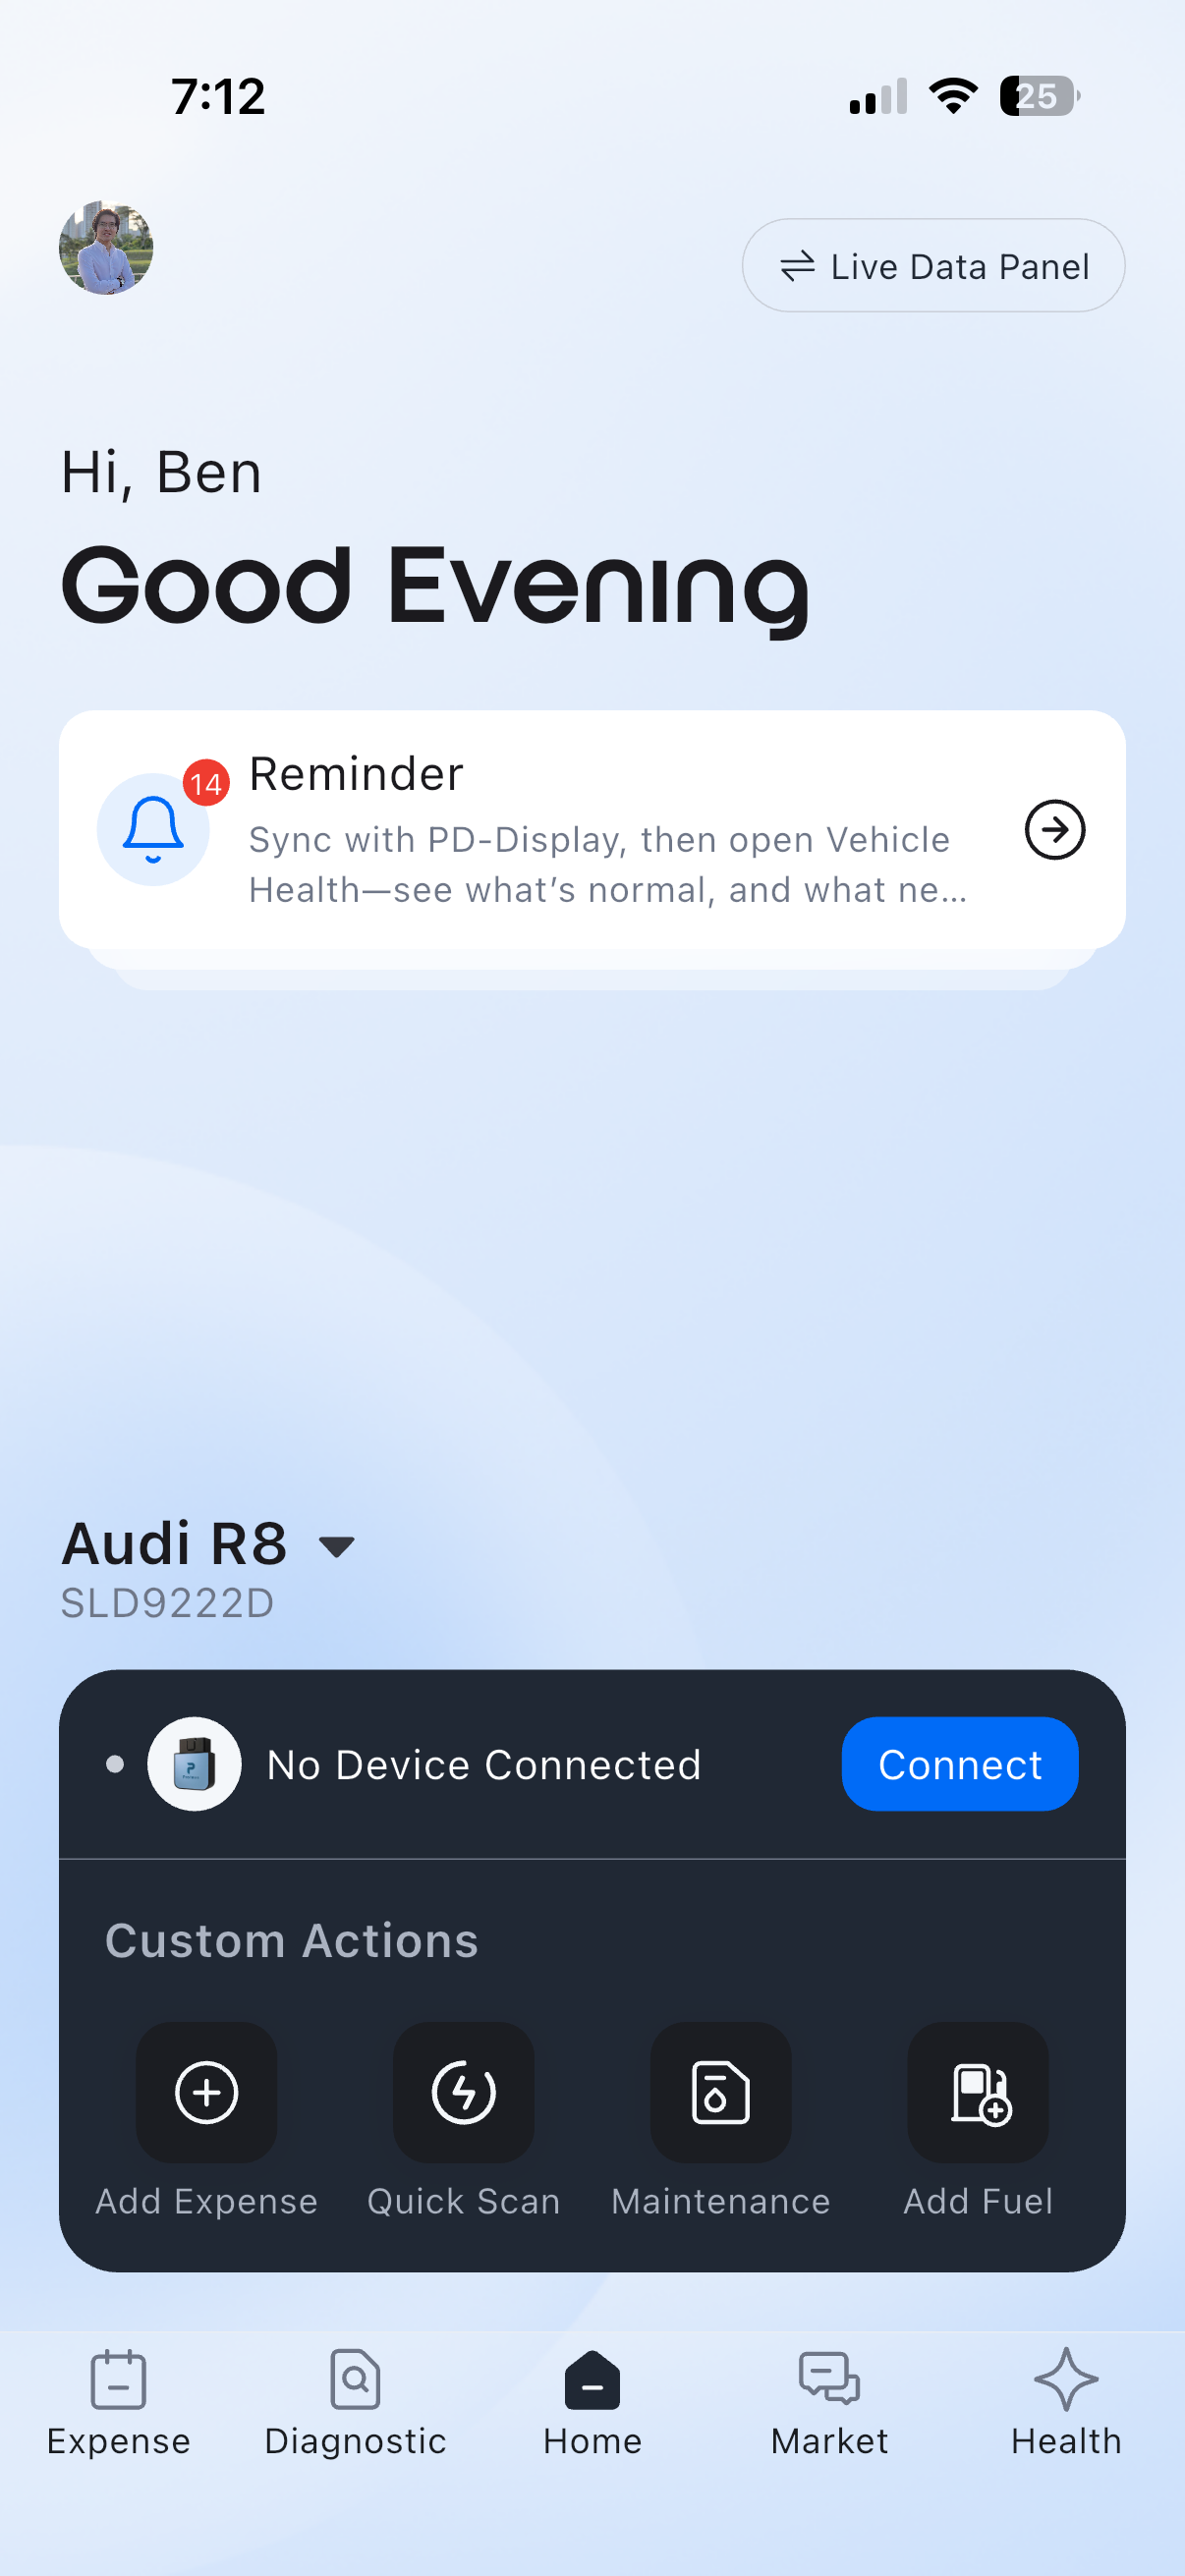
1. Open your profile
From the Home page in the PD-1 mobile app, tap your profile picture at the top left.
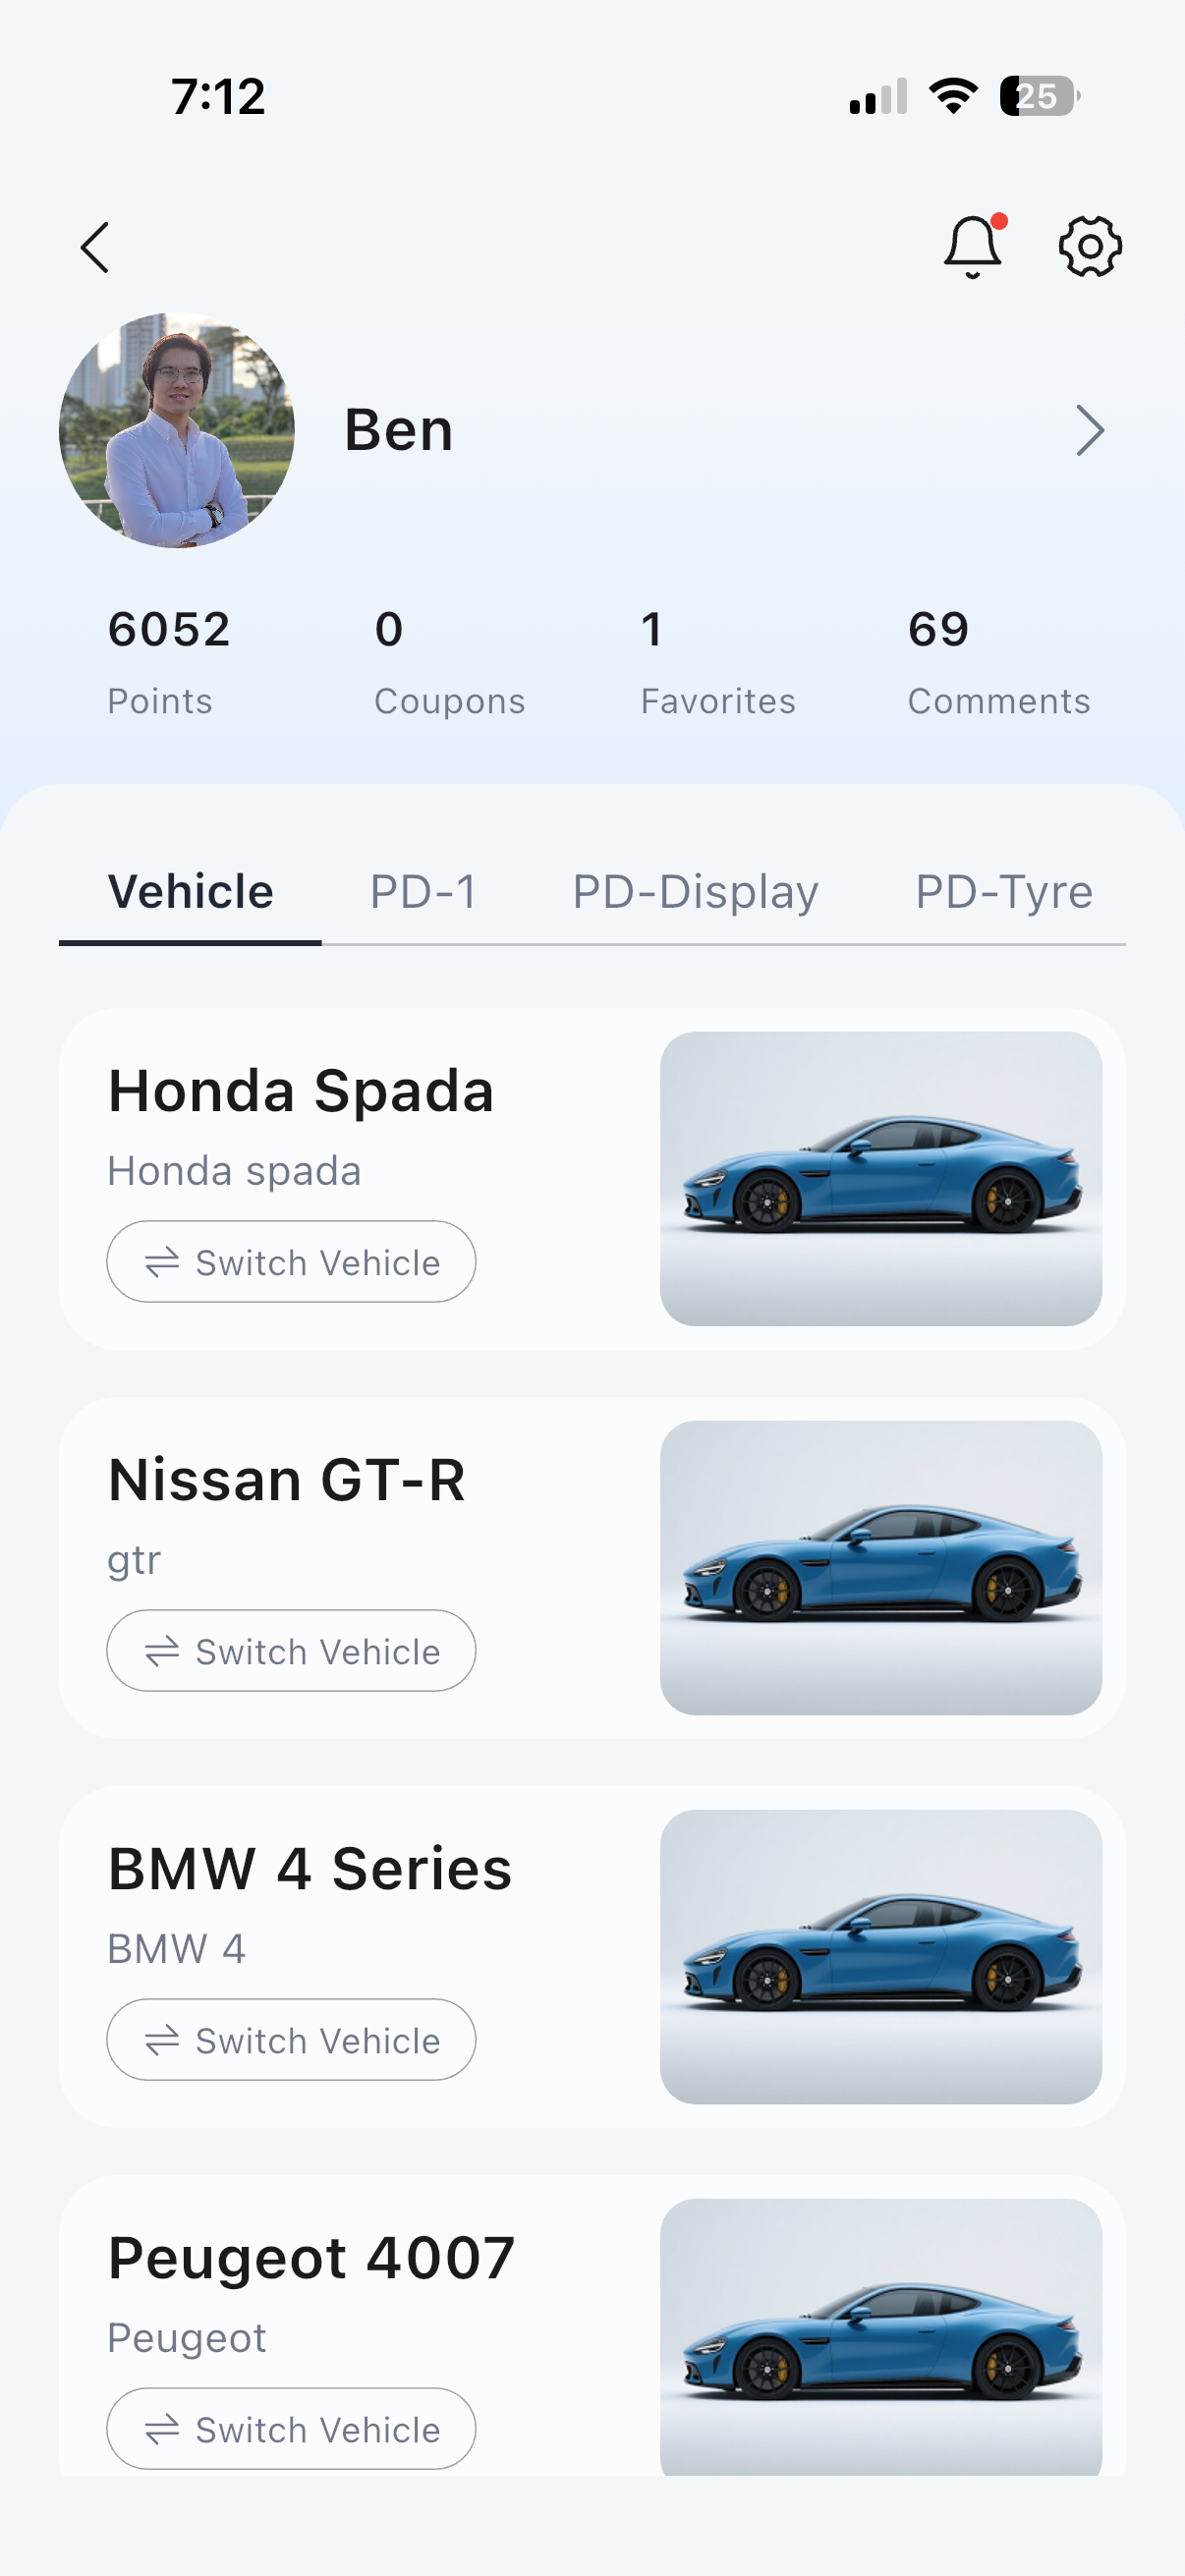
2. Select PD-Tyre
On your profile page, select the PD-Tyre tab alongside Vehicle, PD-1 and PD-Display.
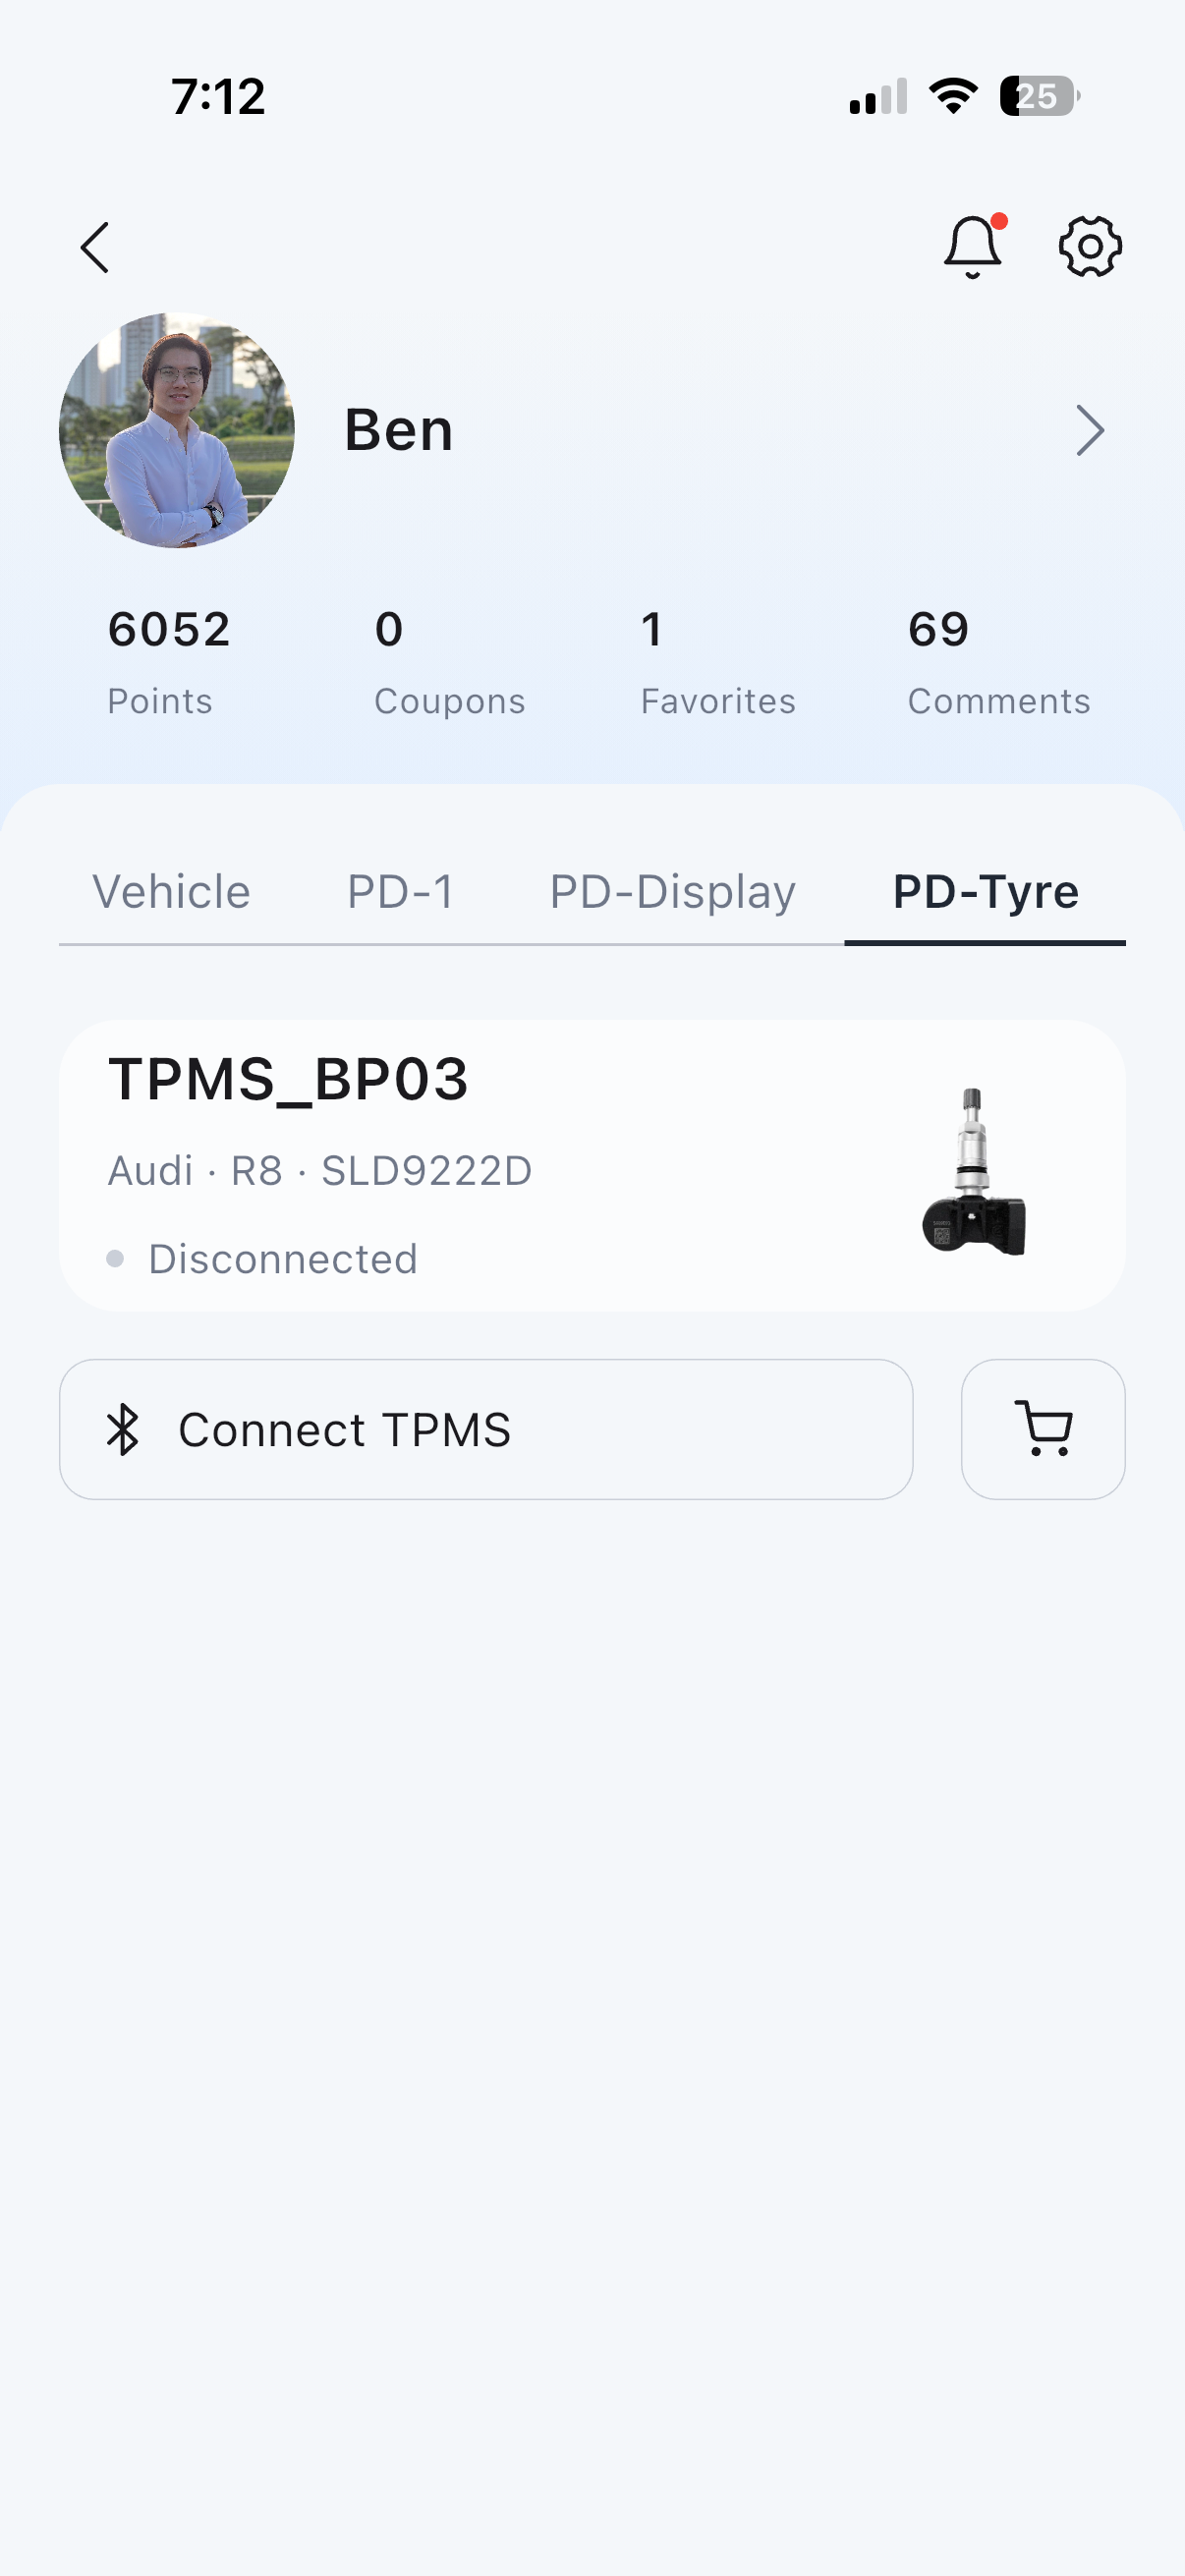
3. Tap Connect TPMS
Tap Connect TPMS, the button with the Bluetooth icon, and connect to your PD-Tyre receiver. Once connected, open its device card to view the PD-Tyre settings.
4. Enter your sensor serial numbers
Under Sensor IDs, tap each wheel position: FL, FR, RL and RR. Enter the serial number from the matching sticker on your printed installation sheet. Confirm each entry before moving to the next wheel.
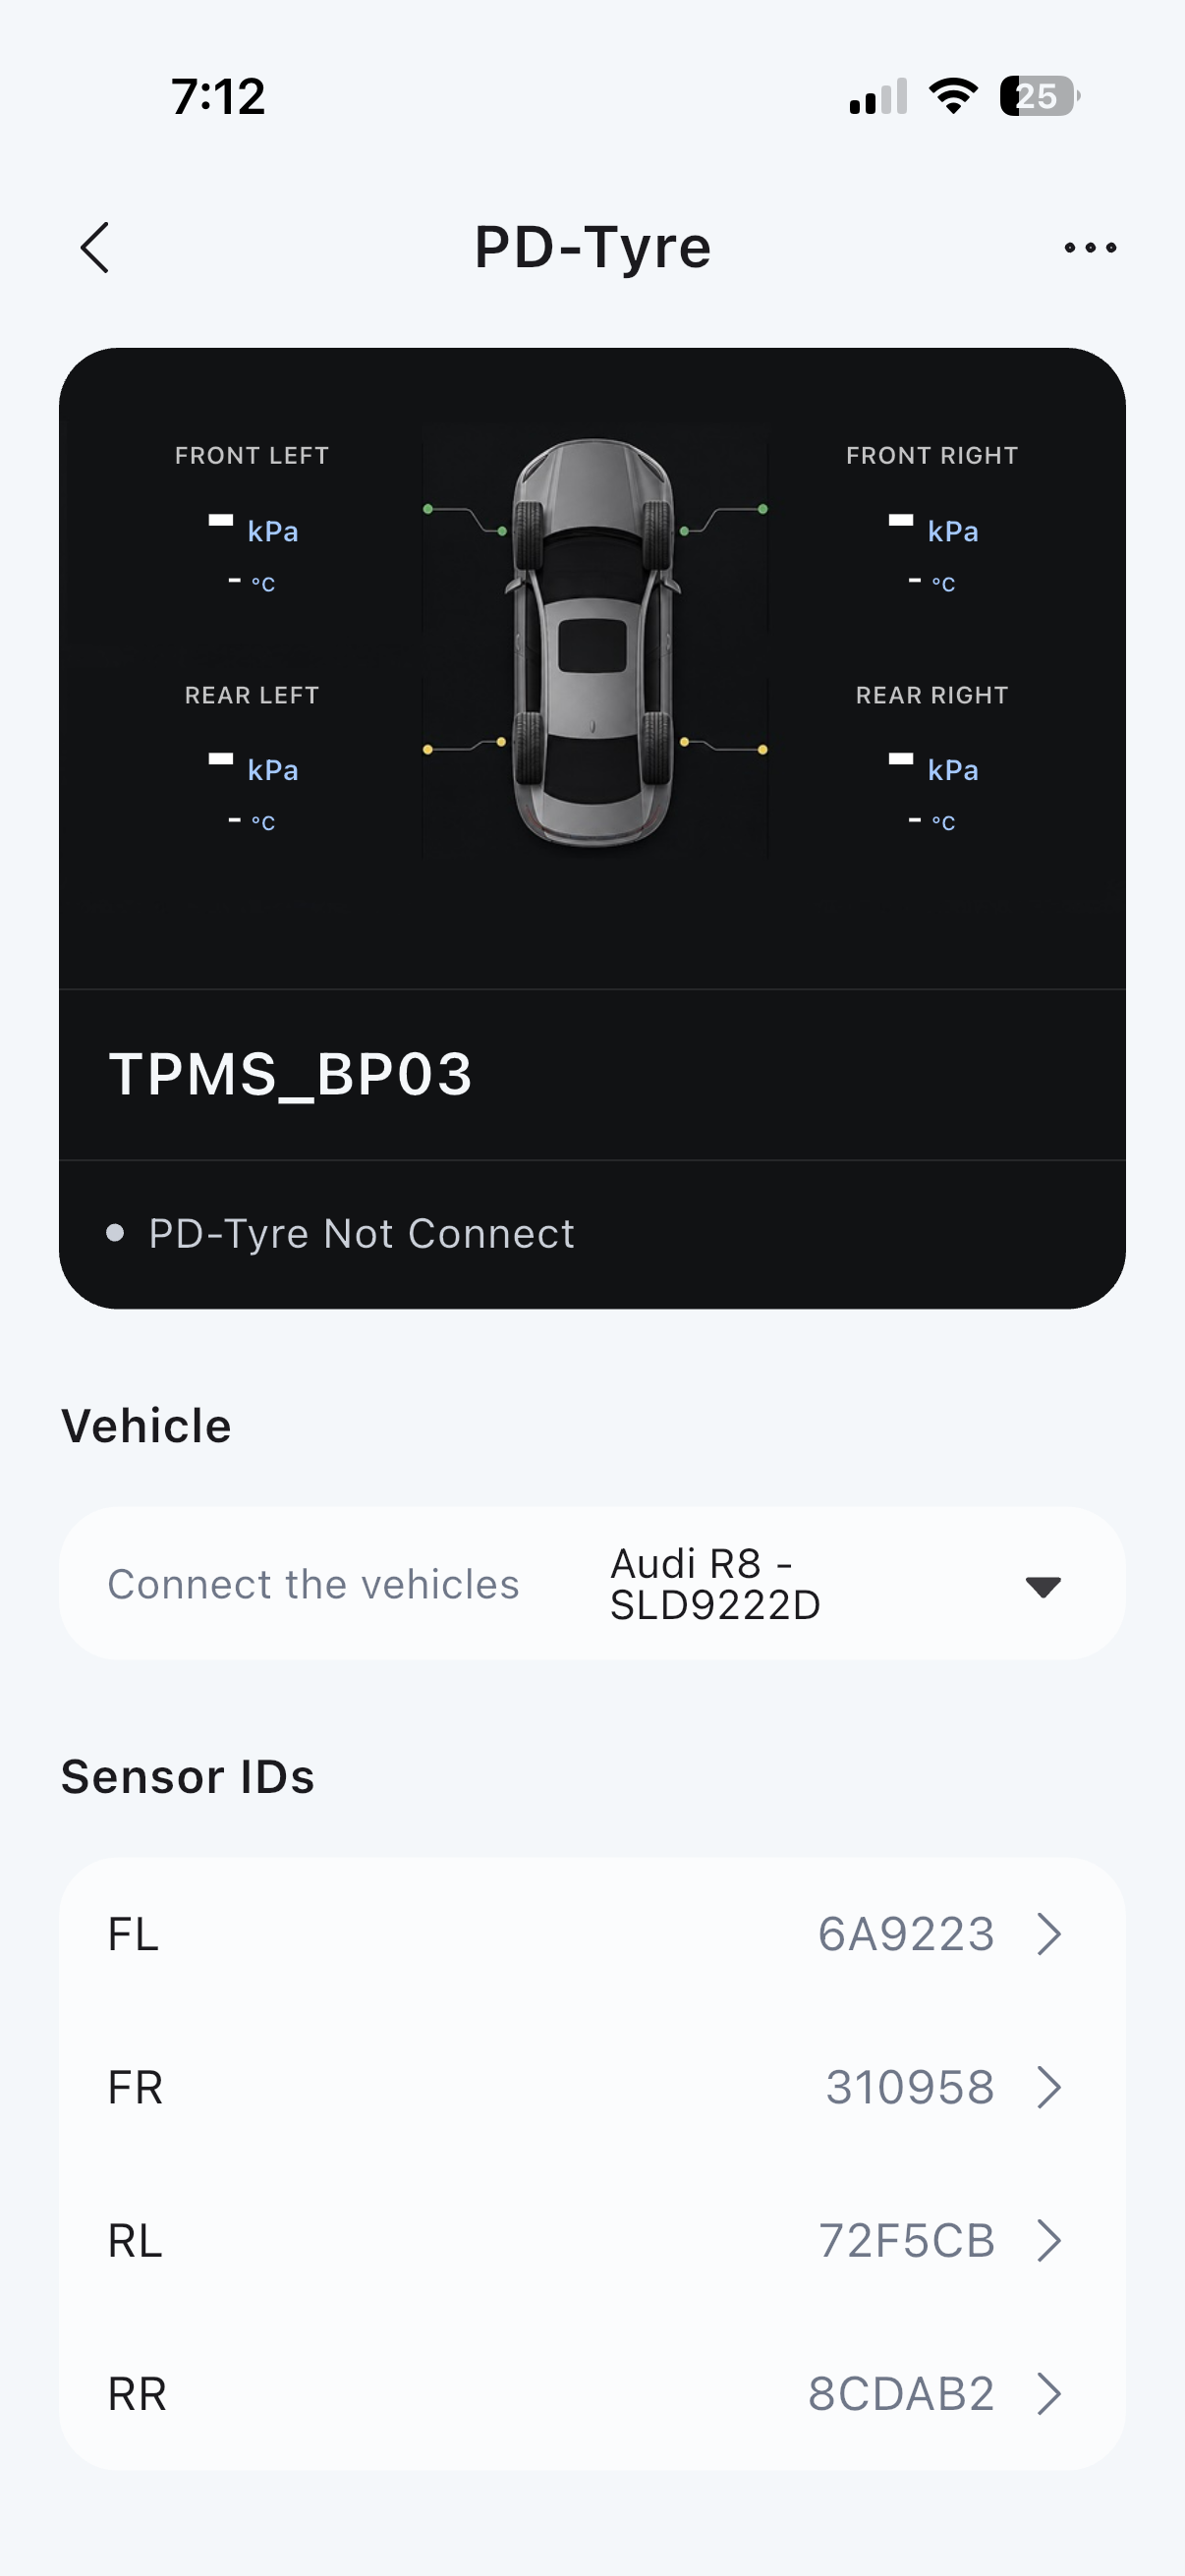
5. Sync with PD-Display
Once all four serial numbers are entered, sync with your PD-Display. Check that all four wheel readings appear at the correct positions.
Check your setup
- FL, FR, RL and RR match the serial-number record on your installation sheet.
- The receiver is connected and pressure and temperature readings appear for all four wheels.
- After a tyre rotation, update the wheel positions so the readings still match the actual wheels.
Need help?
If the receiver will not connect, check that it is powered on, keep your phone nearby, enable Bluetooth and retry Connect TPMS. If one wheel has no reading, check that its Sensor ID matches your recorded label.
Contact the PD-1 team at hello@proteus-dt.com with the step you reached and a screenshot of the issue. Keep your printed sensor record for future reference.