

How do I set up PD-Tyre sensor IDs or update them after a tyre rotation?
Assign each TPMS sensor serial number to the correct wheel, then update the mapping when wheels or sensors move.
What does the Sensor ID setting do?
The Sensor IDs section in PD-Tyre links each wheel position to its TPMS sensor serial number. Use this page for the initial sensor assignment and to update the positions after a tyre swap or rotation.
You are updating which sensor the app associates with each wheel position. The serial number of the physical sensor stays the same.
How do I enter or change a sensor ID?
- Open the PD-Tyre tab and select your TPMS device card.
- On the PD-Tyre page, check the vehicle shown under Vehicle. Select the correct vehicle if needed.
- Under Sensor IDs, tap the wheel position you want to set: FL, FR, RL or RR.
- In the sensor ID window, such as Front Left Sensor ID, enter the correct sensor serial number using the keypad, or choose the matching ID from the list if it is shown.
- Tap Confirm. Repeat for each position you need to update.
- Check all four positions against the sensors actually fitted to the vehicle.
Sensor ID setup screenshots
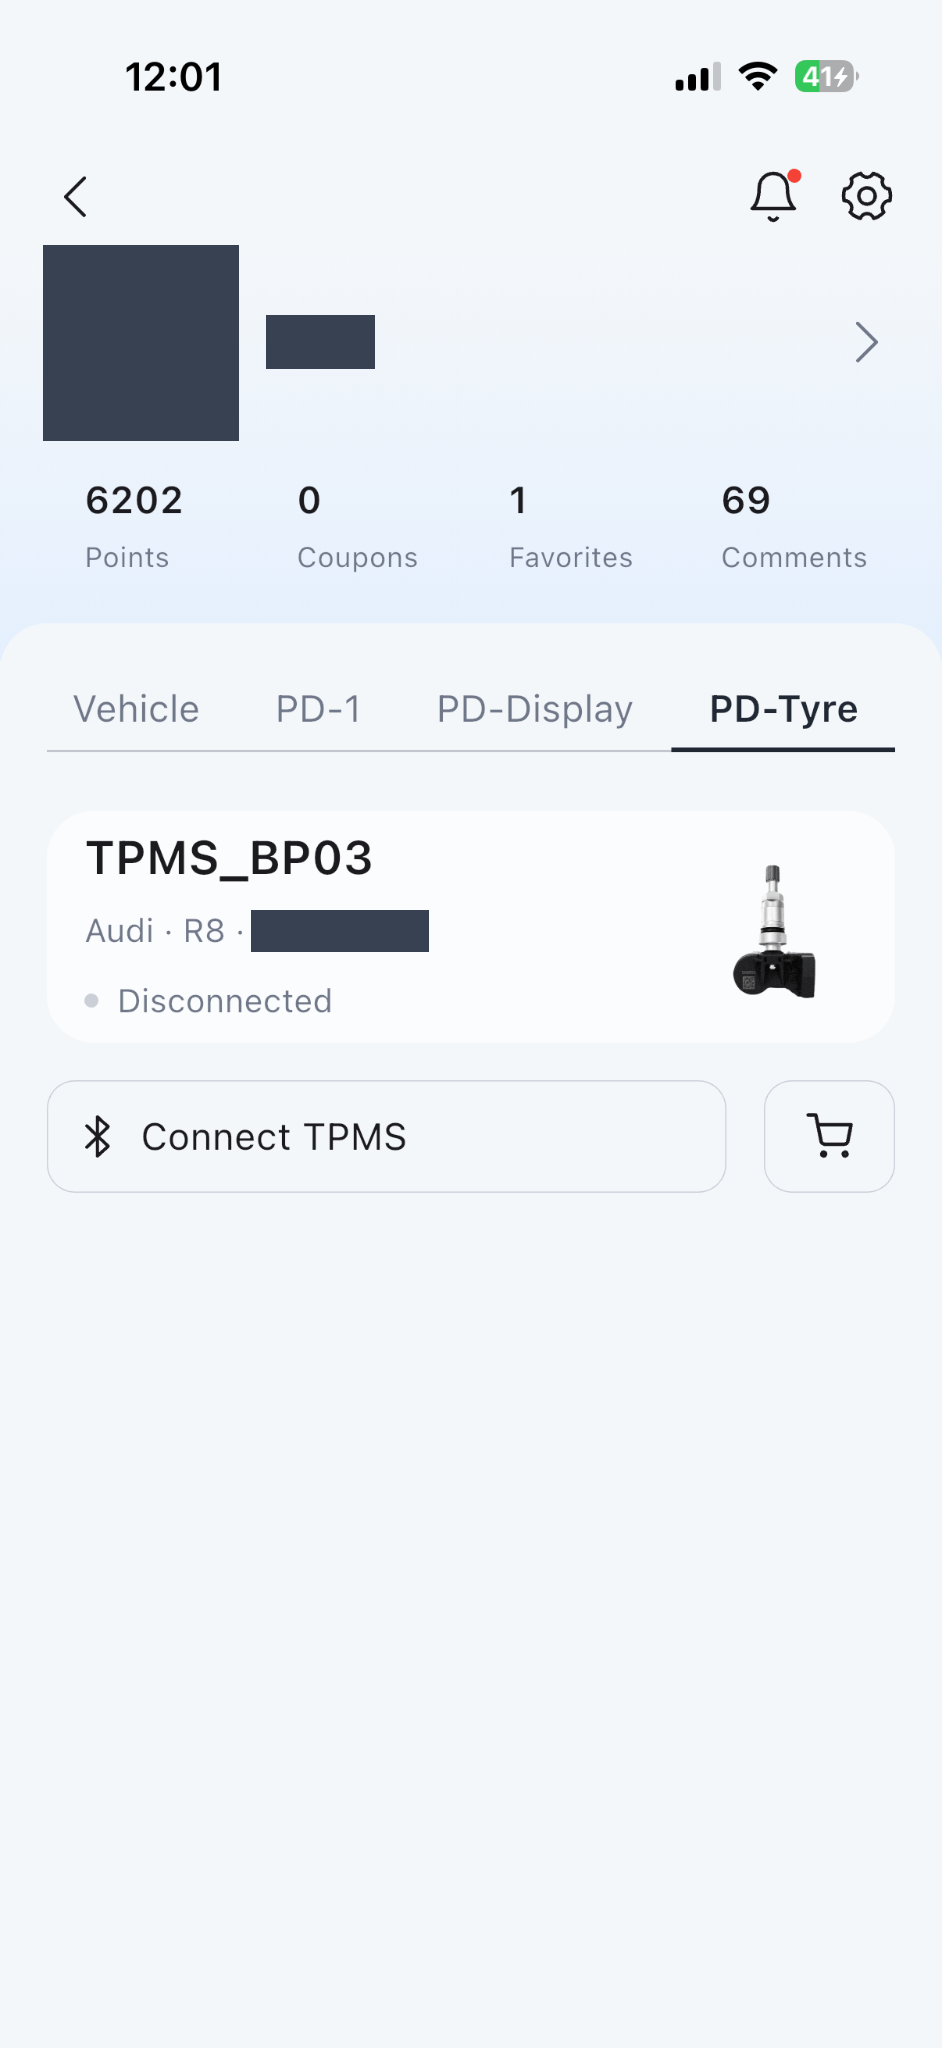
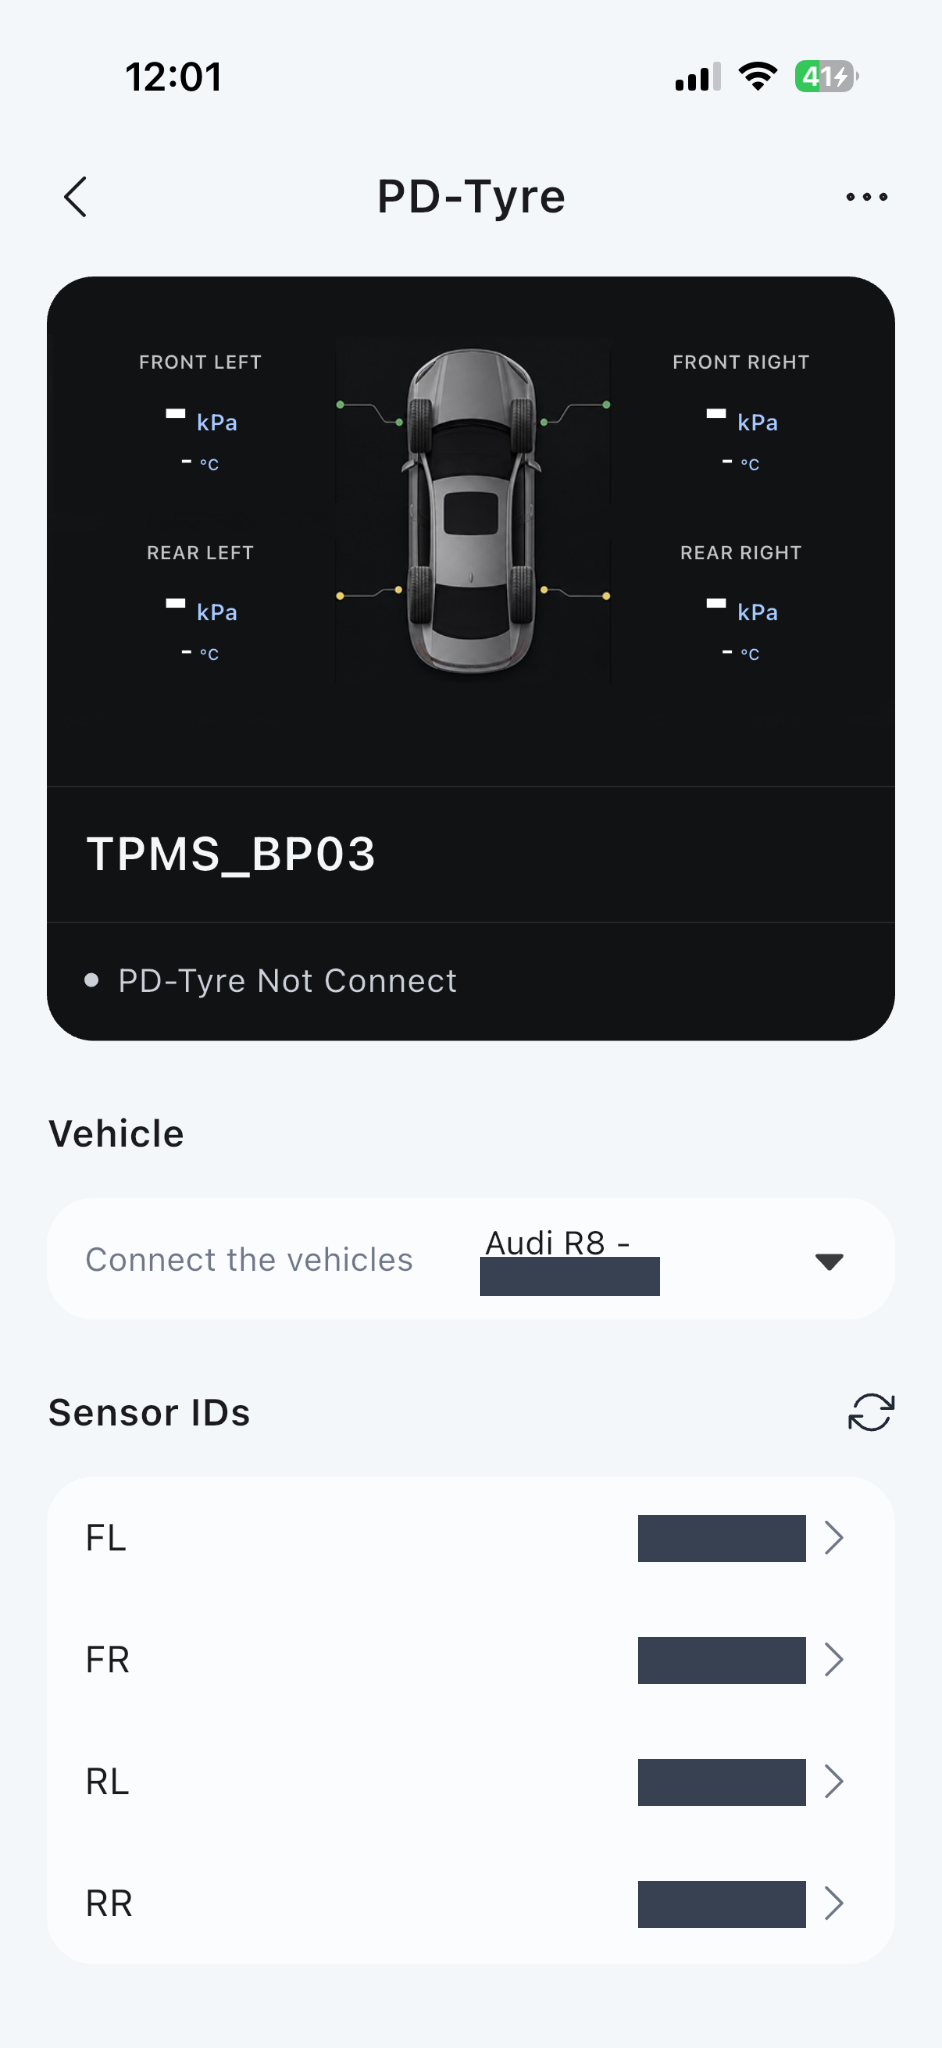
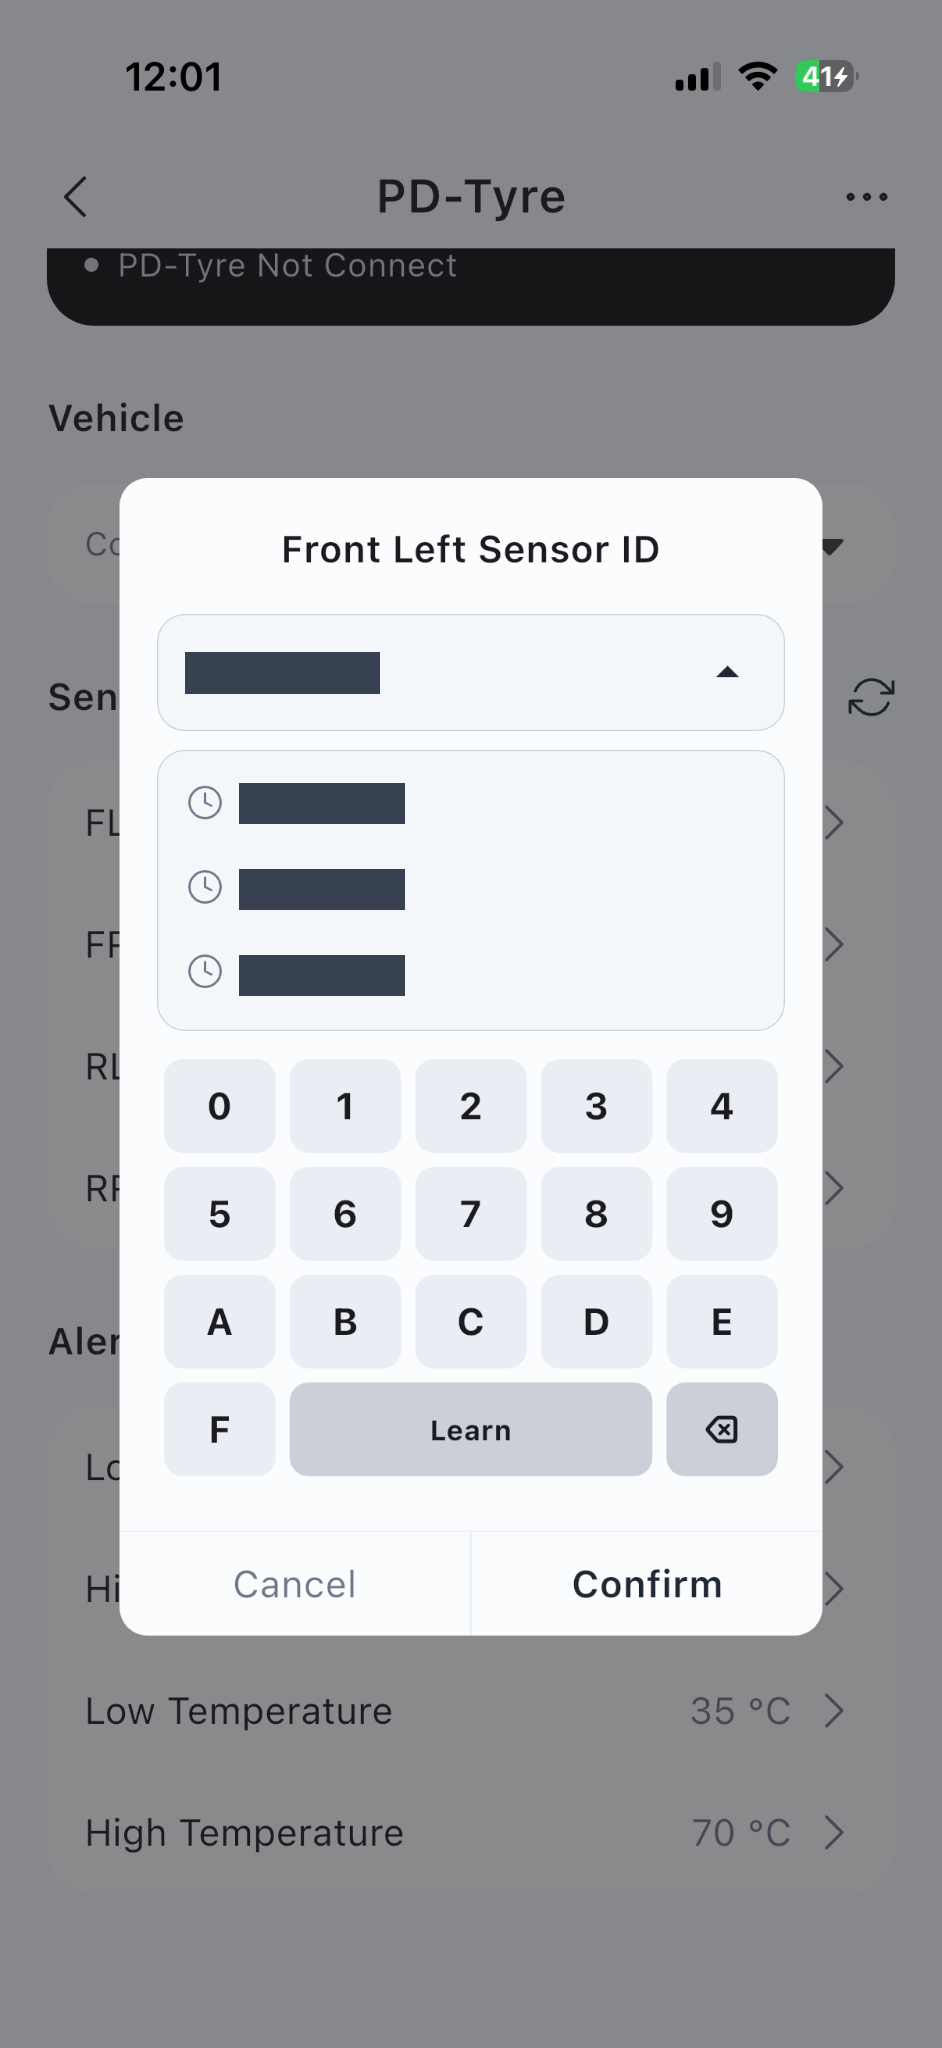
What do FL, FR, RL and RR mean?
- FL: Front left
- FR: Front right
- RL: Rear left
- RR: Rear right
Left and right refer to the vehicle’s left and right when facing forward from inside the vehicle.
What should I change after a tyre swap or rotation?
Update the sensor ID for every wheel position where a different sensor is now fitted.
For example, if the wheel and sensor previously at the front left are moved to the rear left, assign that sensor’s existing ID to RL. Update the other affected positions to match where those sensors are now fitted.
If only the tyre is replaced and the same sensor remains at the same wheel position, the sensor ID mapping does not need to change.
What if a sensor is replaced?
Open the affected wheel position under Sensor IDs, enter the replacement sensor’s serial number and tap Confirm. Check the other wheel positions before finishing.
What if I do not know which sensor ID belongs to a wheel?
Ask your installer to confirm the sensor serial number at each wheel before changing the assignments. Do not guess or reuse an ID just because it appears in the list.